

Step by step written instructions – for video link see your email or enclosed information - images below also for reference.
1 – Read the health and safety instructions – glass can be sharp – handle with care. Photos at the bottom of the page to demonstrate visually.
2 – Keep all the packaging – even the box – you will need it to return your glass project to HQ for firing. Remember to complete your name and address on the card included also – so we know who to return the work to!
3 - Watch the Online step by step tutorial video or follow these written instructions carefully.
4 – Prepare yourself a space to work – a table preferably, away from pets and young children. If you feel your child is capable, they can create with you after reading these steps, do so at your own discretion. Please do not leave children unattended with this kit. Due to small and sharp parts. You will need a pencil and teaspoon to help you too.
5- Carefully unload your kit in front of you. A5 blank paper is for you to design and then work on top of, lay the frit bags out for you to see. Put the Tweezers, PVA glue and cocktail sticks available by your workspace. Place the information sheets so you have access to them should you need to recap over how to handle the glass.
6 - Carefully unwrap the glass base and place on the A5 paper. With a pencil, draw a loose outline around the glass, this will give you a template/guide to design your project on the paper. Place the glass sheet back on the wrapping it was wrapped in for safe keeping.
7- Plan your design, thinking of the colours and styles of glass colour you have in your kit. Each bag is labelled – some colours change during the firing especially red! Always check the colour before applying. Please try to keep the colour separate so to not contaminate the colours.
8- As soon as you feel happy with your design, you may begin. Place the base sheet onto of your design, you should be able to see through the glass to your drawing below. Using the tweezers to help place the pieces of glass, the cocktail sticks to glue and move the glass around (saves your fingers getting glue on them?) When ready you may begin gluing your glass colours down on the base sheet using the PVA included – there is amble in the kit, should you need more, normal PVA glue works.
9- Leave your design to dry, while waiting, please discard carefully of any mixed-up glass pieces – wrap in some tissue and put in your general waste bin. Reseal all the coloured glass bags and place back in the box, return the glue pot and tweezers.
10 – Once dry, please take a photograph of your completed work and send it to us, you can email, tag us on social media or send a picture message – contact details at the bottom of this page. Give your work a little wobble – to make sure all the pieces are stuck down with the PVA glue. Then all that’s left to do is wrap your finished work up in the packaging it came wrapped in.
Using the enclosed self-addressed A4 envelope, put your packed up kit, including your creation into the envelope and post into a Royal Mail post box.
Once your work arrives at HQ it will be checked against your image to make sure nothing moved in transit. Then it will be loaded into our Kiln. The kiln will fire once full, this can take time, please be patient with us. If you are at all concerned, please do get in touch and we will do our best to update you along the way.
We hope you enjoy creating and love your finished artwork. Please do follow us on Social Media and sign up to our updates list on our website.

For demonstration only
Example of the Rainbow Kit contents

How to hold your glass base
Pincer grip - always, reduces the risk of cuts and stops you over handling the top and bottom faces of the glass - grease marks can remain on the glass.

Draw around your base sheet of glass
Carefully, no need to be perfect, its a guide to help you design your work.

Plan your design
top tip if using lots of different colours label each colour section so you knwo where you are, especially when doing a rainbow - the red, oranger and yellow all look similar in frit form.

Glue it down!
Glue down your colour in colour ways to avoid cross contamination and escaped colours mixing up. The first colour you can sprinkle over the work - this is super fast to do, but the next colour will need to be more controlled.
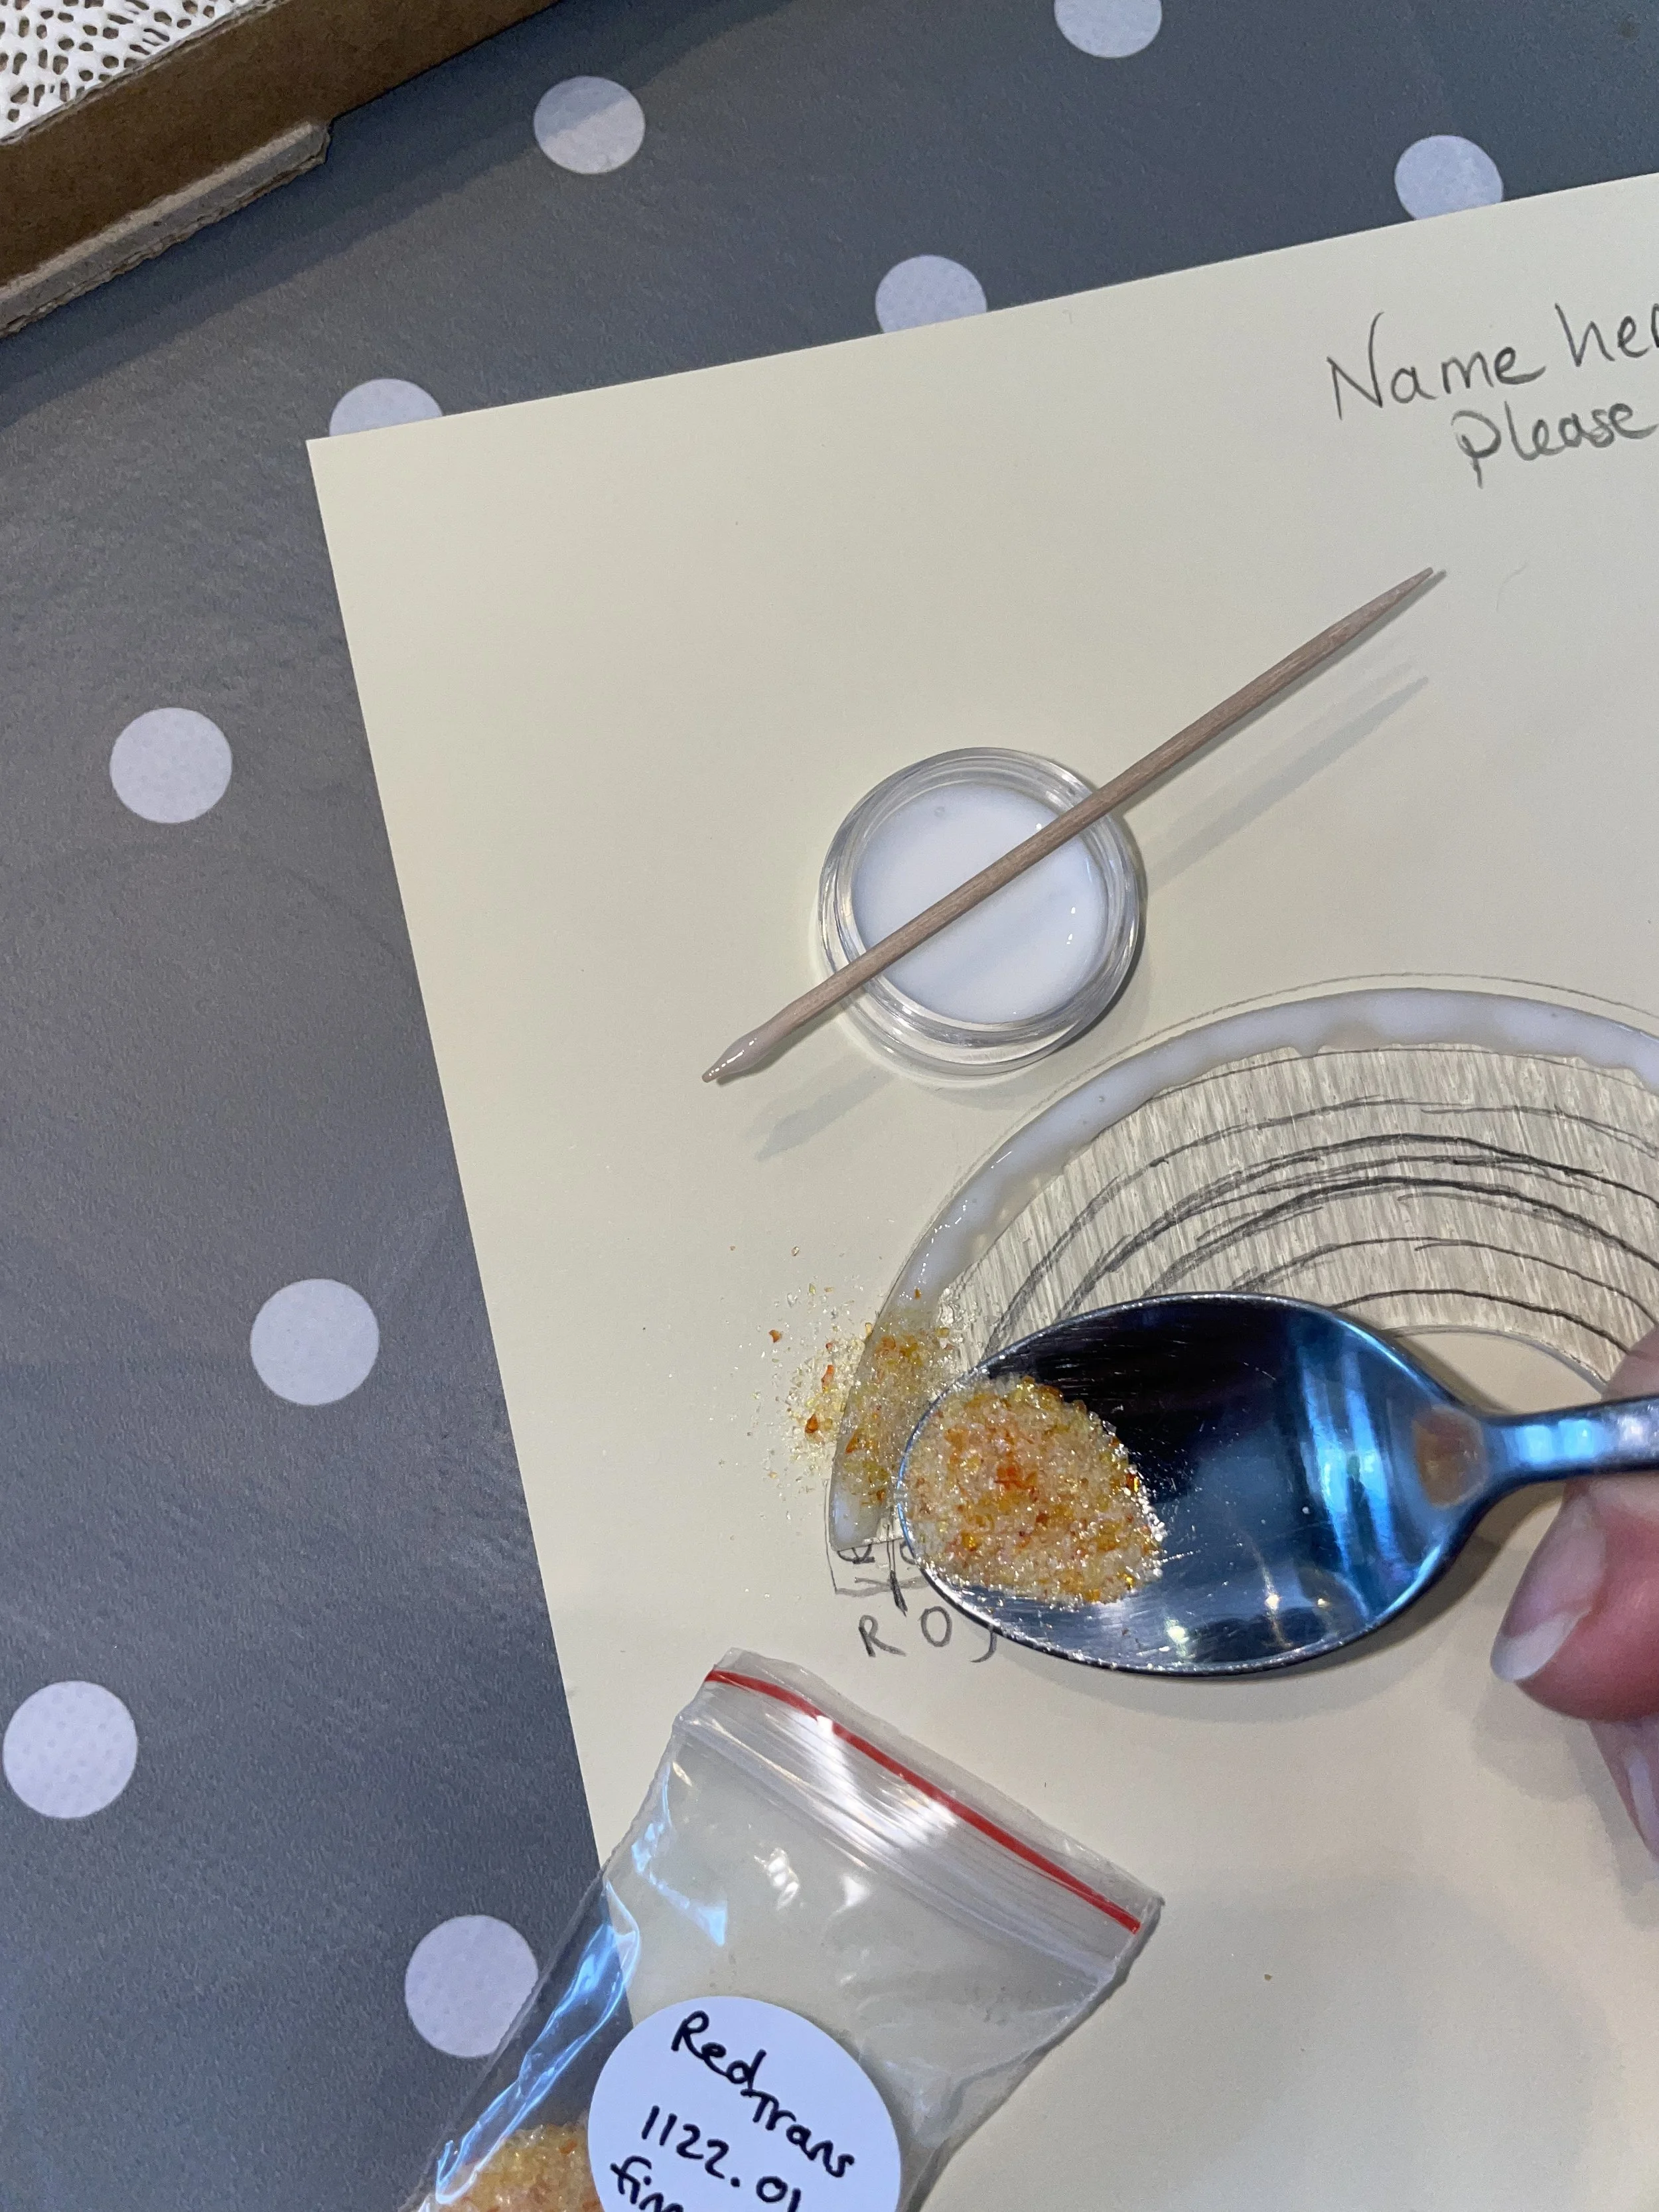
Sprinkle technique
Using a teaspoon sprinkle the colour on, tip the excess off onto the paper below

Covering the glue completely
The first colour application is fastest done by gluing where you want the colour to stick , sprinkle it on and then tipping the excess off onto the paper below.

Save any excess from the first colour application
The first colour application is fastest done by gluing where you want the colour to stick , sprinkle it on and then tipping the excess off onto the paper below. This can then be easily put back in the bag as shown above. Only works one time though else you will contaminate the bags.

Adding more colours
Using the tweezers and cocktail stick move the frits into place. I glue first and add the frits after. Making sure they are stuck down in place. A light shake test will tell you if you need to add more PVA glue.

Photo time
Take a photo with your smart phone or camera and email it to us at hello@omistudio.co.uk

Pack the kit up
Once your work is dry, please pack your kit back up as you received it - the non slip mat really does help to protect your work in the post.
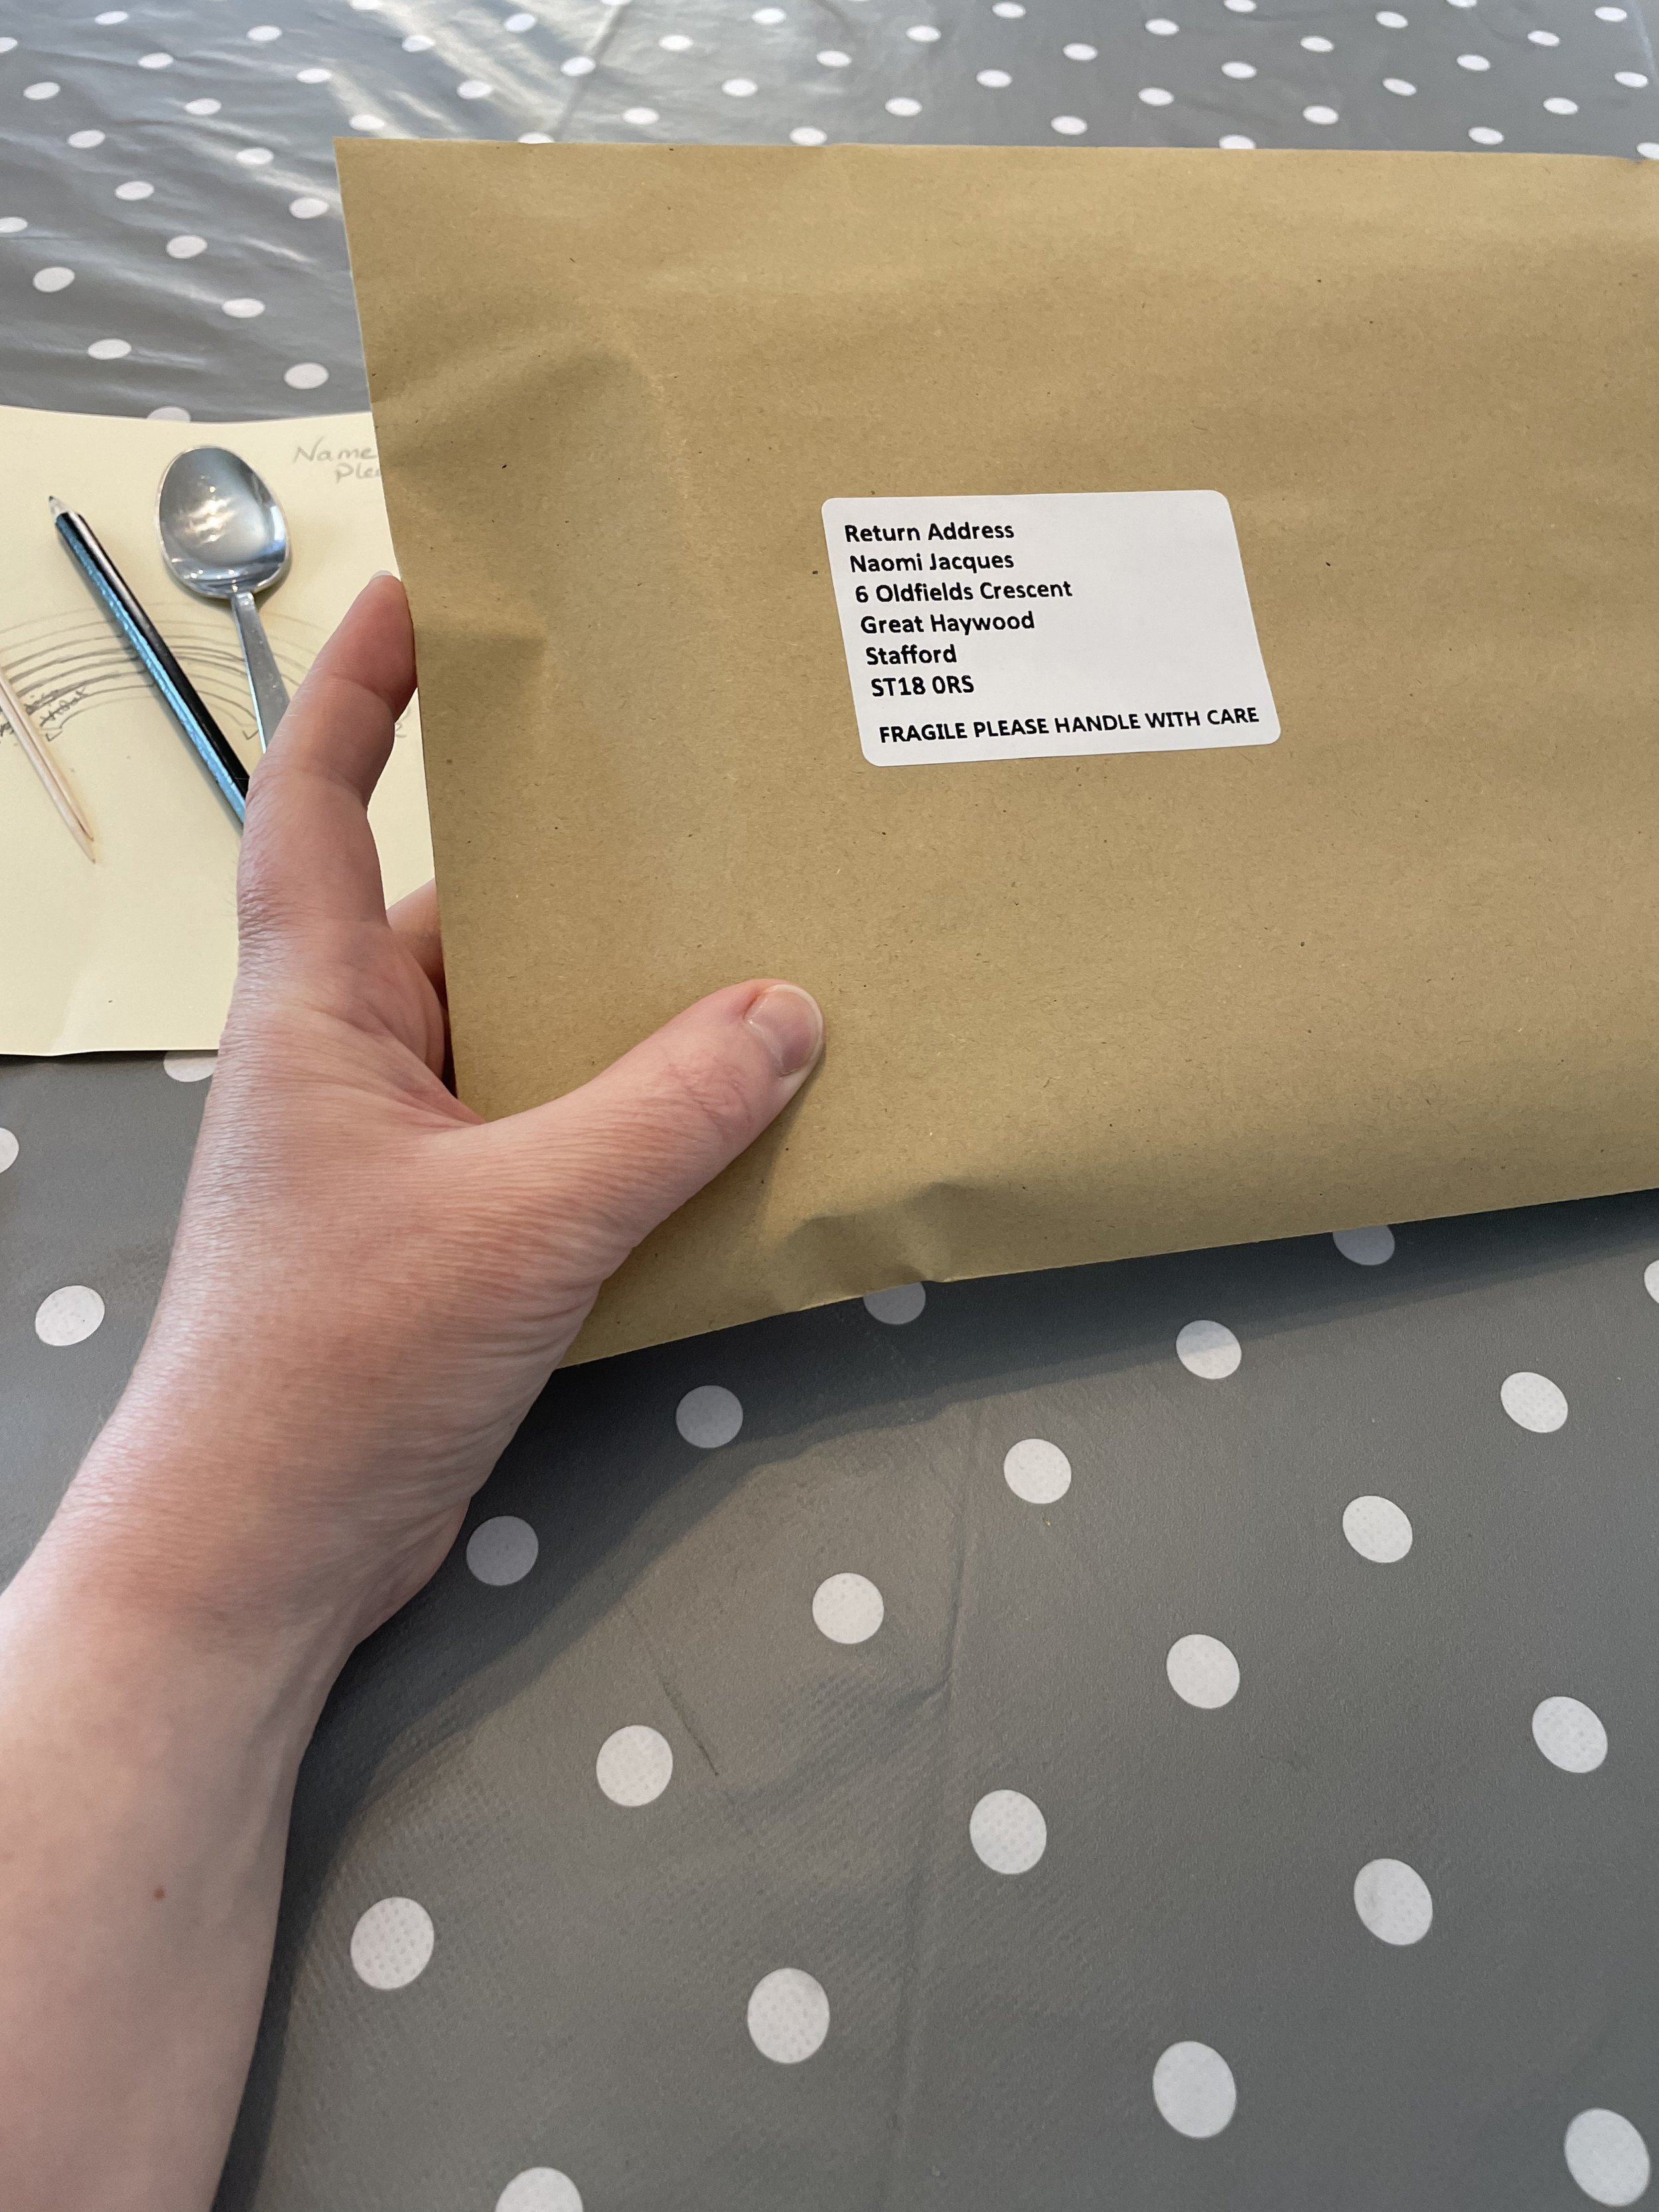
Post it back to HQ
Once your box is repacked pop it in the prepaid envelope and return to have your work fired in the kiln. Dont forget it include your MADE BY ME card so we know who to return it to.